During Spring 2022, I attended a 15 week course of Visual Design. In the first six weeks of the course I was taught and experimented with the different tools and shortcuts of Adobe Photoshop.


This project required a number of tools to be utilized. Beginning with the magic wand tool I removed the white surroundings, then used the lasso tool to copy and paste each piece onto it’s own layer. After lining up each pieces with the other I used the healing brush to remove the separations. By selecting all, ctrl A, and ctrl shift C to copy the full image as one. Finally I used the auto tone and color tools used in the image window to alter the color.
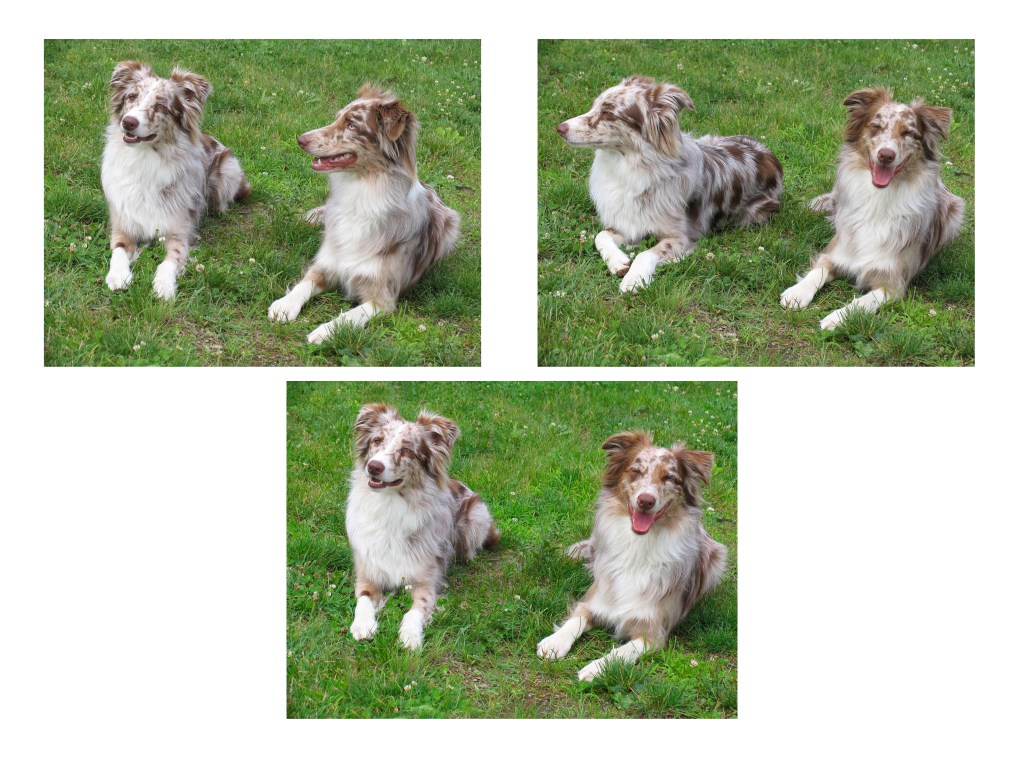
For this project I started with two photos of the dogs side by side, both are two different image layers and lined up to where they would be in the final project. Applying a layer mask to the top image I then used the brush to with black color, revealing the good picture of the good image of the right side dog.

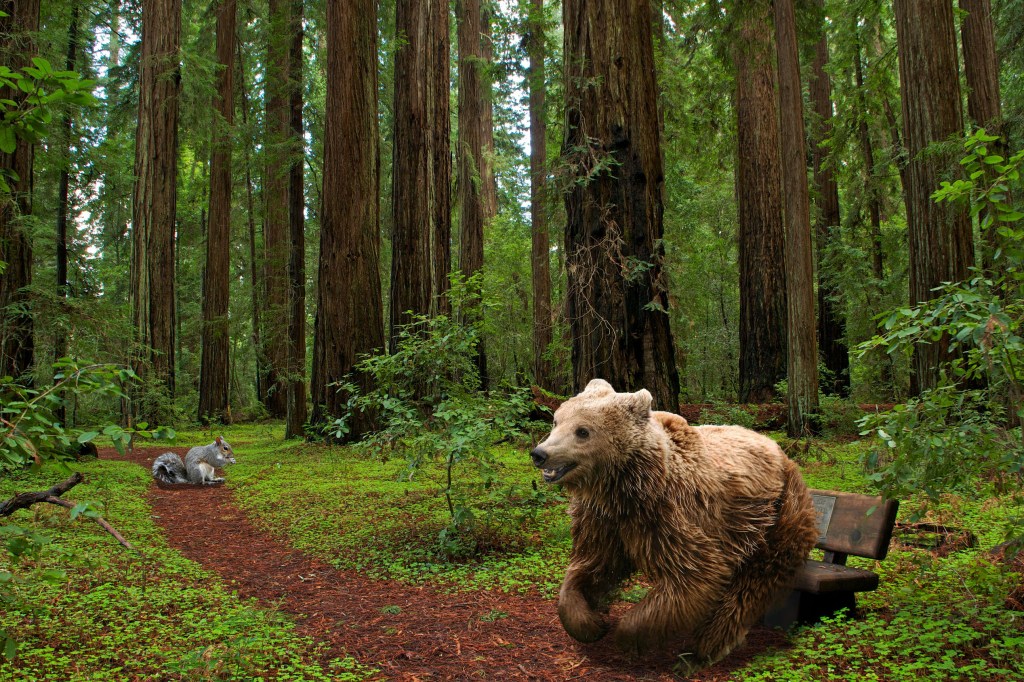
For this project I used the lasso tool to fill in the missing grass corner. By selecting the corner with the lasso tool then in the edit window I hit fill, then the section is filled with similar grass to its surroundings. I also used the clone stamp tool to cover the sprinkler caps.

This project allowed me to experiment with the spot healing brush. I used the tool to remove the initials, bullet holes and climbing rope that gears viewers attention away from the climber.
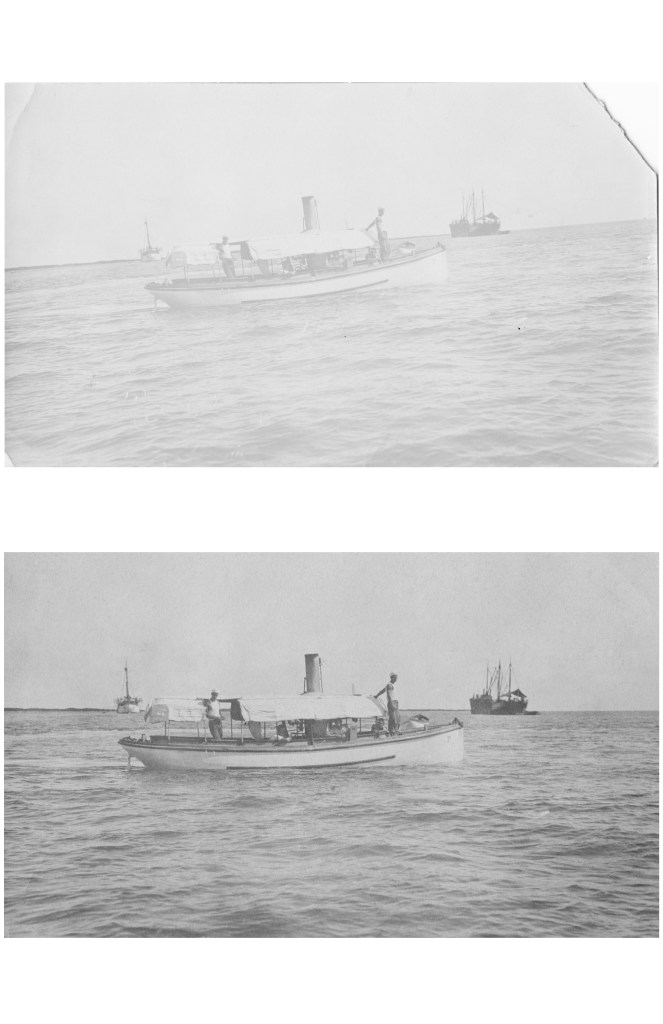
This project required the use of the cropping and lasso tool. To straighten the image I used the bubble level in the crop tool selection, by making a line where the water and sky meet. Secondly I used the lasso tool to fill in the missing corner.

This project required for the use of the quick selection tool and replacing color. By quick selecting one shirt, hitting the image window, then the option that says “replace color” I changed each shirt to be different color.
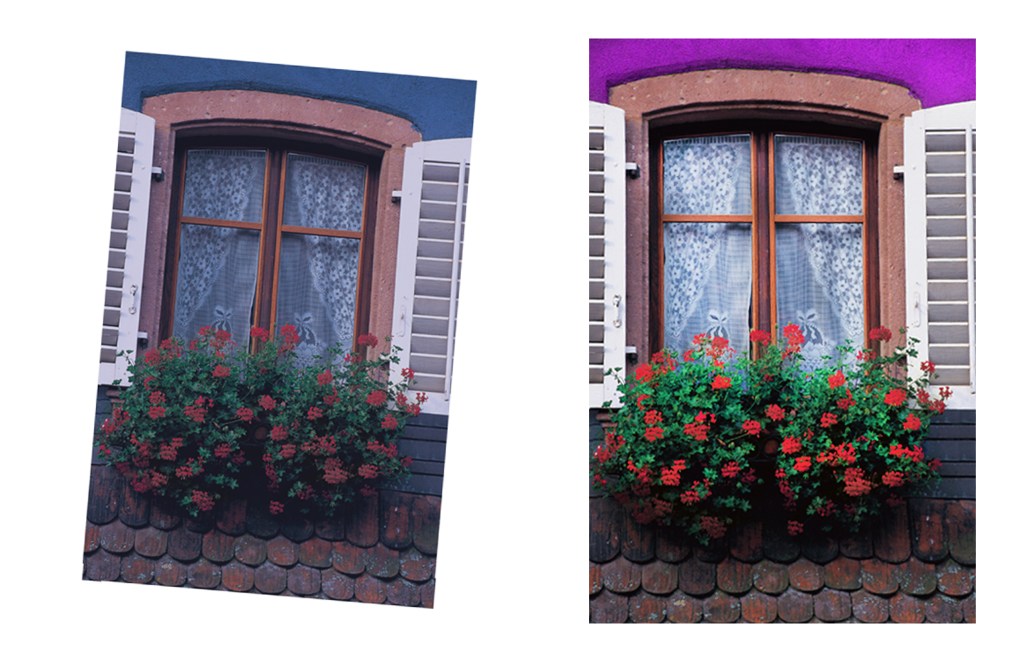
This project required the cropping tool, auto fixing the coloring of the image, and the use of the the lasso tool. First I used the cropping tool to straighten the image and remove the white parts around the image. Secondly I used the auto tone and color options under the image window, continuing by using the dodge and burn tool. Using 3 strokes of the dodge tool to lighten the windows and 2-3 clicks of the burn tool on the roses brightened the red. Lastly I used the lasso tool to change the color of the house to a pink purple.

This project allowed me to experiment with more efficient way of creating layered product. I utilized the quick selection tool in photoshop to remove the backgrounds on photos I took of my sister as well as an image of a daisy. On all three images I applied the select and mask tool and then the refine edge brush to remove anything photoshop missed. I copy and pasted the daisy six times to create a row of daisies then selected all six to link the layers. I applied a light purple background to contrast with the yellows featured in each image. I retouched the hair with the original mask, to get rid of the harsh line in the version above. I applied a brightness of 10 to the top left image so the colors of the sweaters match. Finally I did a final application of brightness of 5 to the image on right so the color match of my sisters skin was not too different.

Photoshop: Layer Masks #2
Explored the ways that layers masks work. Using the gradient tool to create the saturated look to my mountains in the night.
Photoshop: Layer Masks #1
This project taught me how to get the fine hairs on animals using a mask layer, also known as a vector mask. Differing from the previous selection project I was taught that it is easier and more efficient to add an additional photo, and if you ever need to retouch in the future. I learned to make shadows using a brush at 50% hardness and dropping the opacity as well.

Photoshop: Coloring Page
For this project I used tools such as eyedropper, brush, history brush, smudge, and crop. With different brush tips I was able to create texture on the flowers leaves and with the various colors I got from a reference photo I was able to create depth of each flower petal. I am still working on using the correct shortcuts for different aspects of projects.

Photoshop: Selections
In recreating this image I used the new keyboard shortcut Command D after using each tool to select an image. The different tools I learned to use were the Marquee tools, the lasso tools, the magic wand tool, and finally the select tools. The biggest problem I ran into during this project was with the bobcat image and refining the edges, I was unable to refine the mask enough at first but continued to restart the process and fixed the issues.
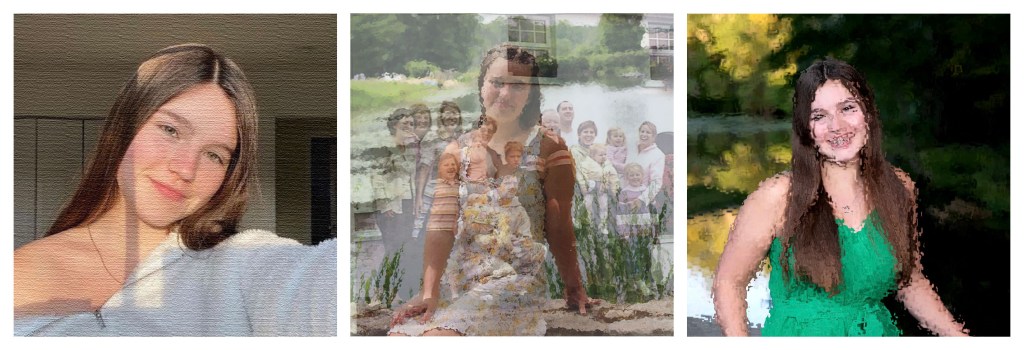
For this project I picked three of my favorite photos of myself, which I edited to represent different aspects of my self identity. I began with a 150 ppi resolution photoshop letter document, and set a 6in by 6in guide layout with .25 margins and gutters. Each photo used was cropped to be 6in by 6 inches at 150 ppi in a separate tab than the final layout. Starting from the left box I chose a simple phot that doesn’t have too much detail, I applied a canvas filter which represents my artistic side. Next, the middle image was altered with a frosted glass filter to blur the details on my dress as well as the background. Secondly I blended a family picture, from when I was around 2yrs old, that represents my Irish heritage and name by right clicking next to the layers name. In order to bring the blended image to the final project, I used the shortcut command A to select the work and then command shift C to copy all its layers. Finally the last image was taken at the country club I used to attend, I applied the water ripple filter to represent the summer days I spent there. In all this project was fun and allowed me to experiment with the different filters available in photoshop.
Photoshop: Resizing and Cropping
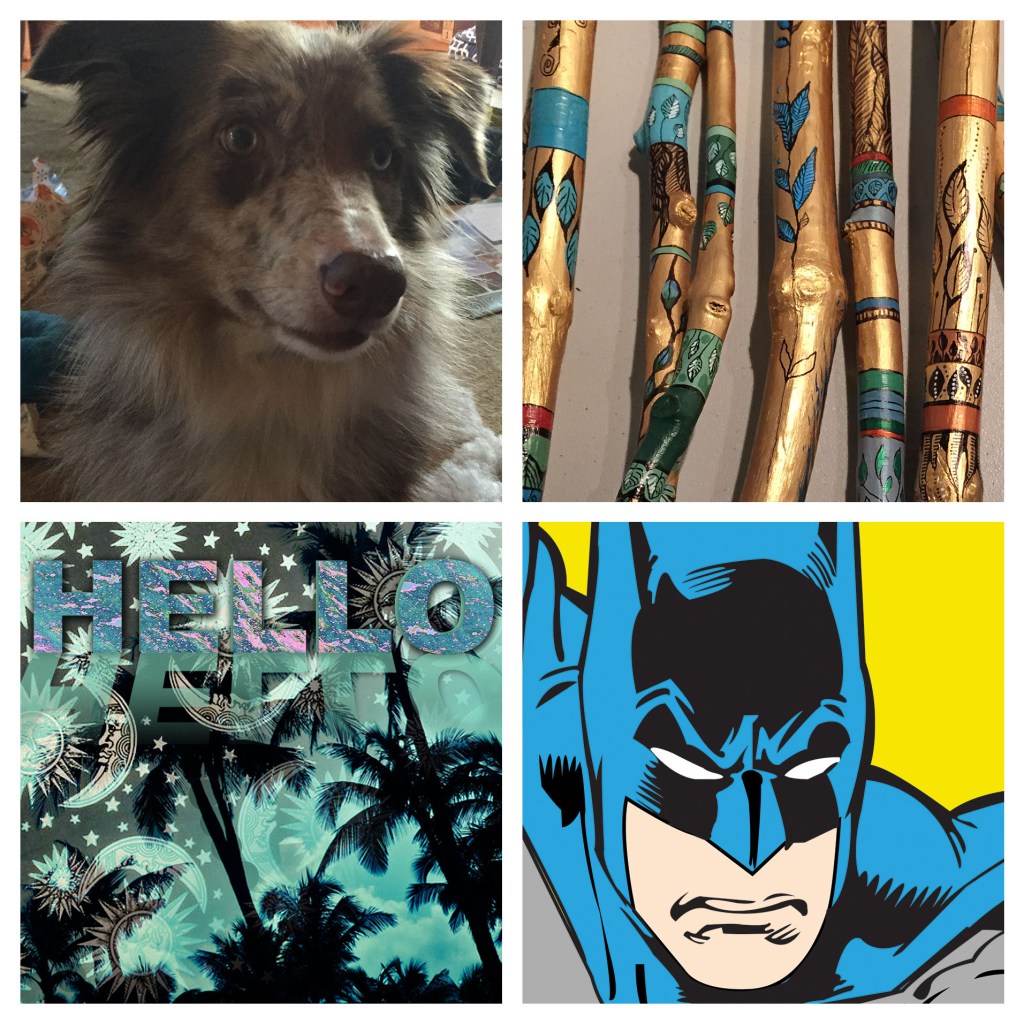
I created a new guide layout, width and height at 12.75 inches with margins and gutters at 1/4 of an inch. I resized and cropped the images to fit in the 6 by 6 inch areas we created with the guide layout. I learned the copy merge shortcut, command shift c, with the Hello and Palm tree Image where multiple layers had to be copied over.
Photoshop: 4 Animals
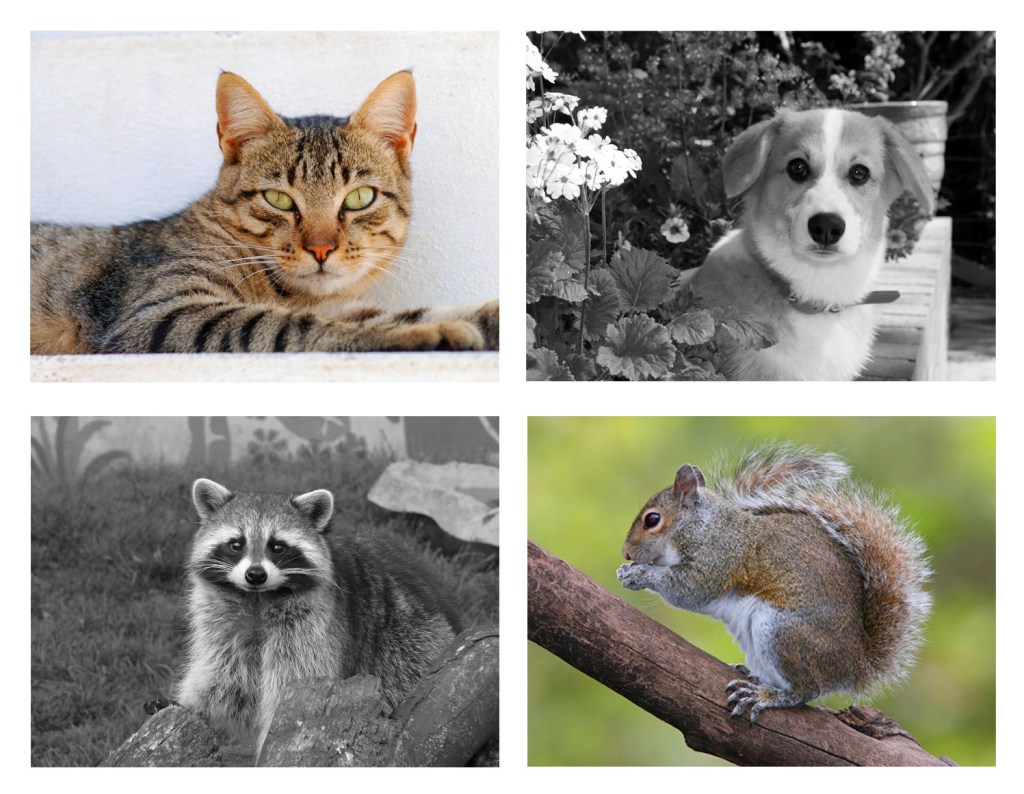
For this project I used the move tool for three of the four images to create balance. For the final image I transformed the image using command T to resize it and make it the same size as the others. I used the black and white filter on two of the four images and a red saturated filter on the opposing two. Finally on the black and white dog image I applied a pink hue to make the dog look lighter but not washed out.
